Mimetite, Aragonite, Conichalcite
Tsumeb Mine, Otjikoto Region, Namibia
Shortwave
© Jim Horste

Exsolution Willemite, Calcite
Sterling Hill Mine, Ogdensburg, New Jersey
Shortwave
© Jim Horste

Chlorophane, Apatite, Calcite
Taylor Road Site, Franklin Mine, Franklin, New Jersey
Shortwave
© Jim Horste

Apatite
Chongyi County, Ganzhou Prefecture, Jiangxi Province, China
Mid-wave
© Jim Horste

Fluoborite (?), Wollastonite, Calcite
Xianghualing Min, Linwu, Chenzhou Prefecture, Hunan Province, China
Shortwave
© Jim Horste

Barite, Calcite
Sterling Hill Mine, Ogdensburg, New Jersey
Shortwave
© Jim Horste
Margarosanite, Fibrous Wollastonite, Willemite
Franklin Mine, Franklin, New Jersey
Shortwave
© Jim Horste

Willemite, Calcite, with unknowns
Third Plain Zinc Deposit,
Australia.
Shortwave
© Jim Horste

Aragonite, Calcite
Beltana Mine (Puttapa Mine), Australia.
Shortwave
© Jim Horste

Apatite, Magnatite
Great Western Mine, Iron County, Utah
Shortwave
© Jim Horste

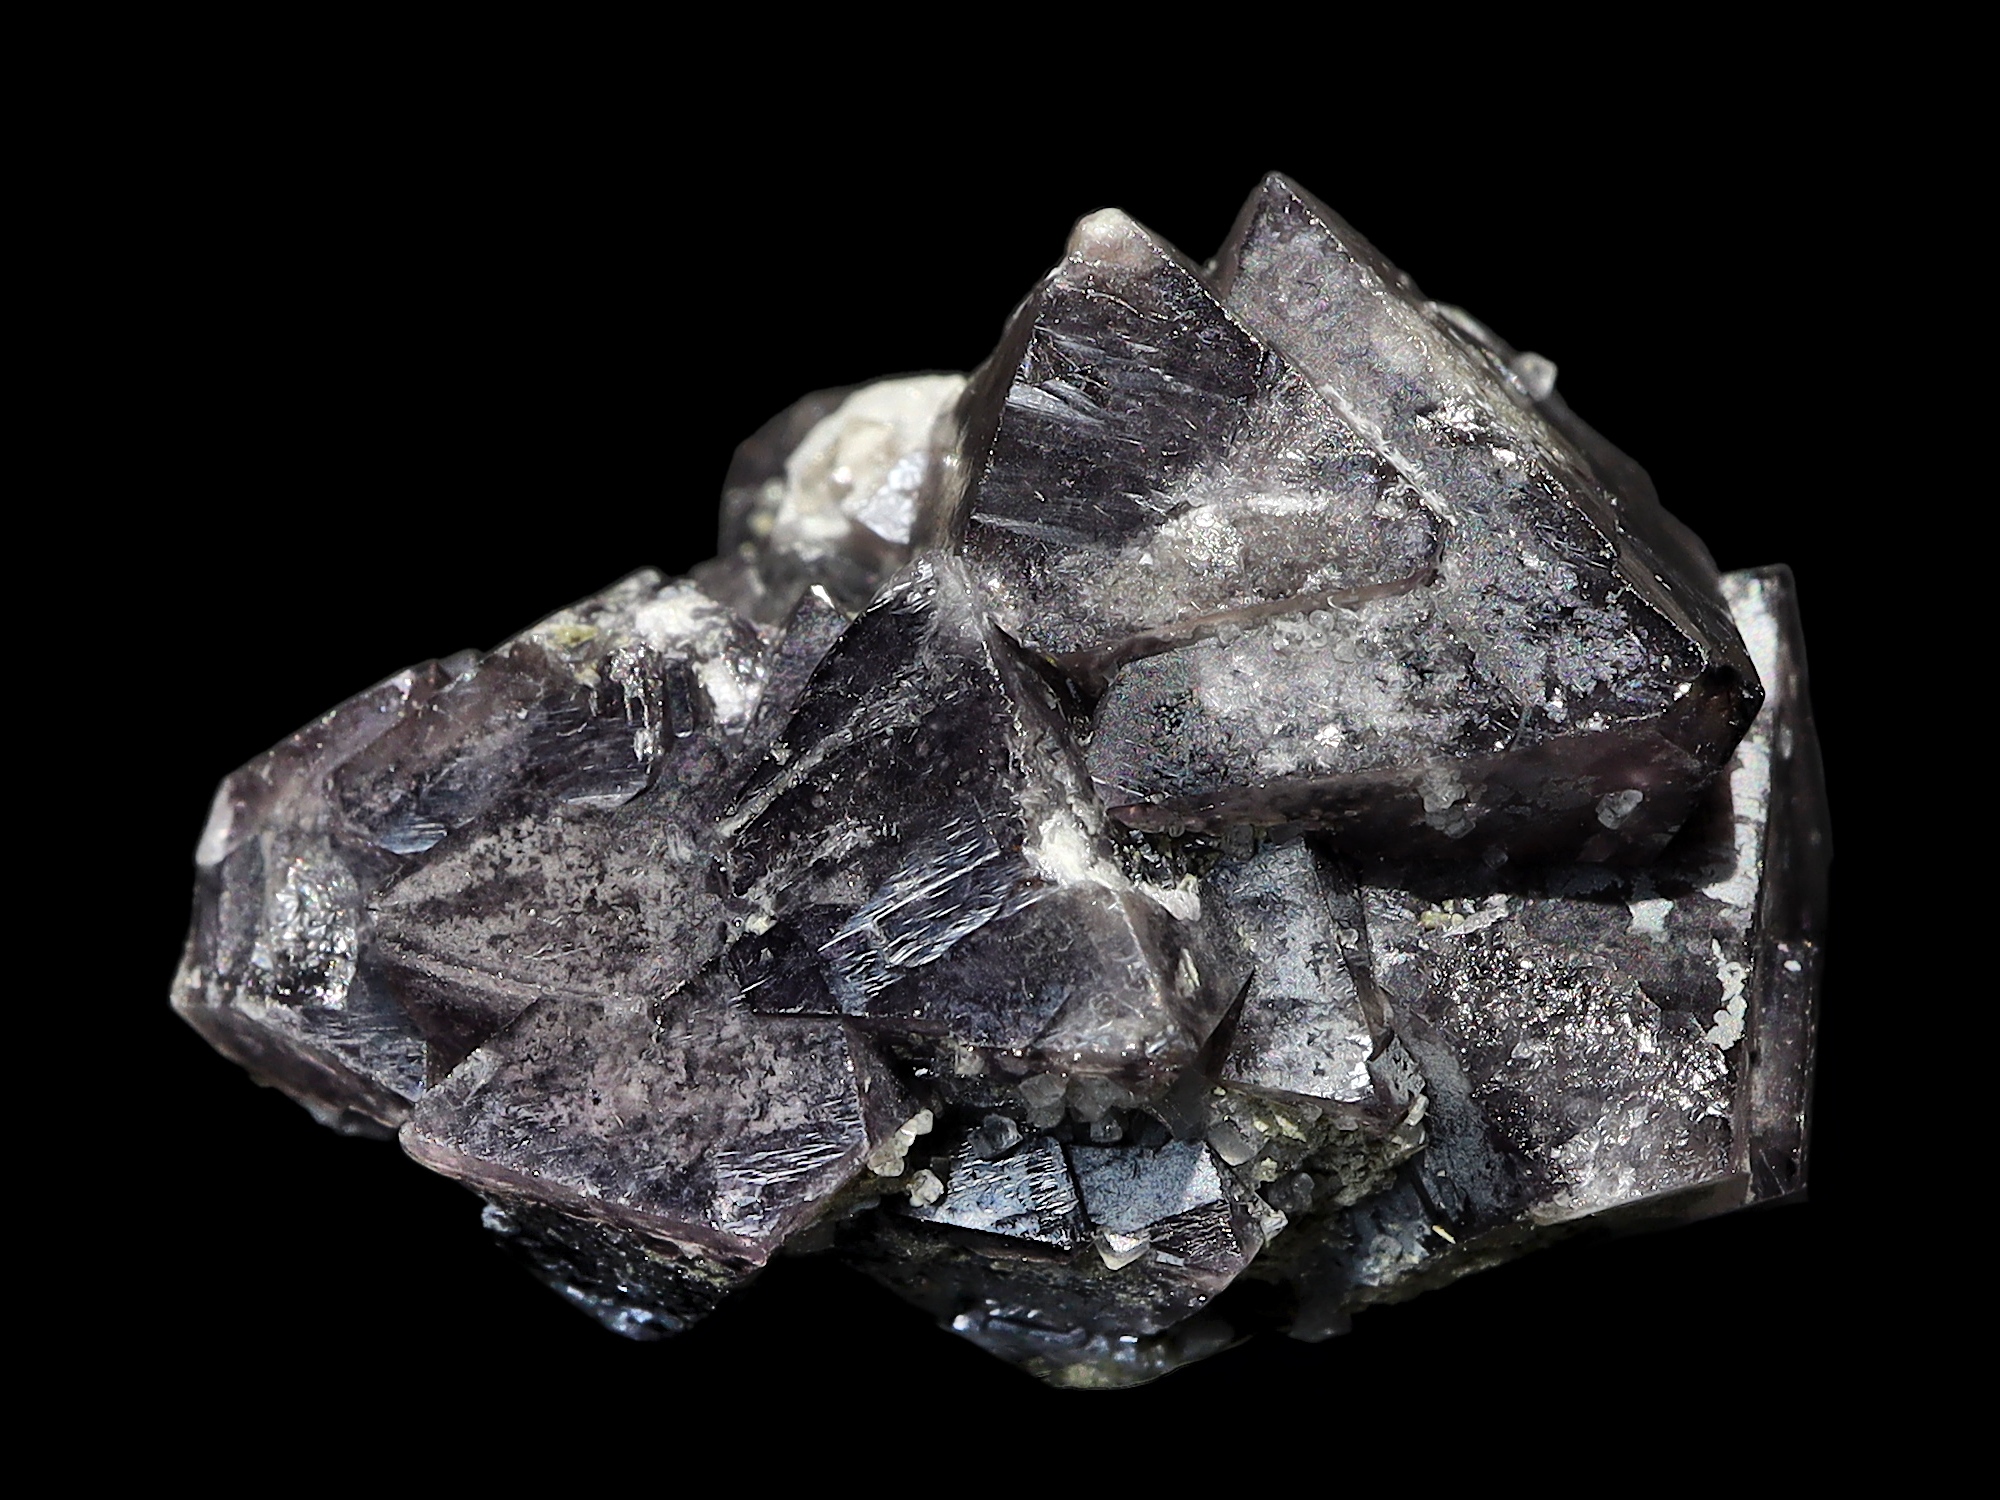
Sphalerite
Horn Silver Mine, Frisco, Utah
Longwave
© Jim Horste

Willemite, Calcite, Fluorite (FL Blue)
Purple Passion Mine, Wickenburg, Arizona
Shortwave and mid-wave
© Jim Horste

Calcite and Calcite
Patagonia Mountains, Arizona
Shortwave
© Jim Horste

Margarosanite, Willemite on feldspar
Franklin Mine, Franklin, New Jersey
Shortwave
© Jim Van Fleet

Margarosanite, Willemite on feldspar
Franklin Mine, Franklin, New Jersey
Shortwave
© Jim Van Fleet

Margarosanite, Minehillite, fibrous Wollastonite on feldspar
Franklin Mine, Franklin, New Jersey
Shortwave
© Jim Van Fleet

Nasonite, Pectolite, Willemite on non-fluorescent hancockite
Franklin Mine, Franklin, New Jersey
Shortwave
© Jim Van Fleet

Prehnite. Pectolite, Willemite, Xonotlite, Margarosanite on Manganaxinite
Franklin Mine, Franklin, New Jersey
Shortwave
© Jim Van Fleet

Fluorite
Boulder County, Colorado
Longwave
© Earth Extractions

Sphalerite
Boulder County, Colorado
Longwave
© Earth Extractions

Uraninite
Boulder County, Colorado
Longwave
© Earth Extractions

Dry Head Agate
Southern Montana
Shortwave
© Earth Extractions

Chalcedony
Northwest Nebraska
Shortwave
© Earth Extractions

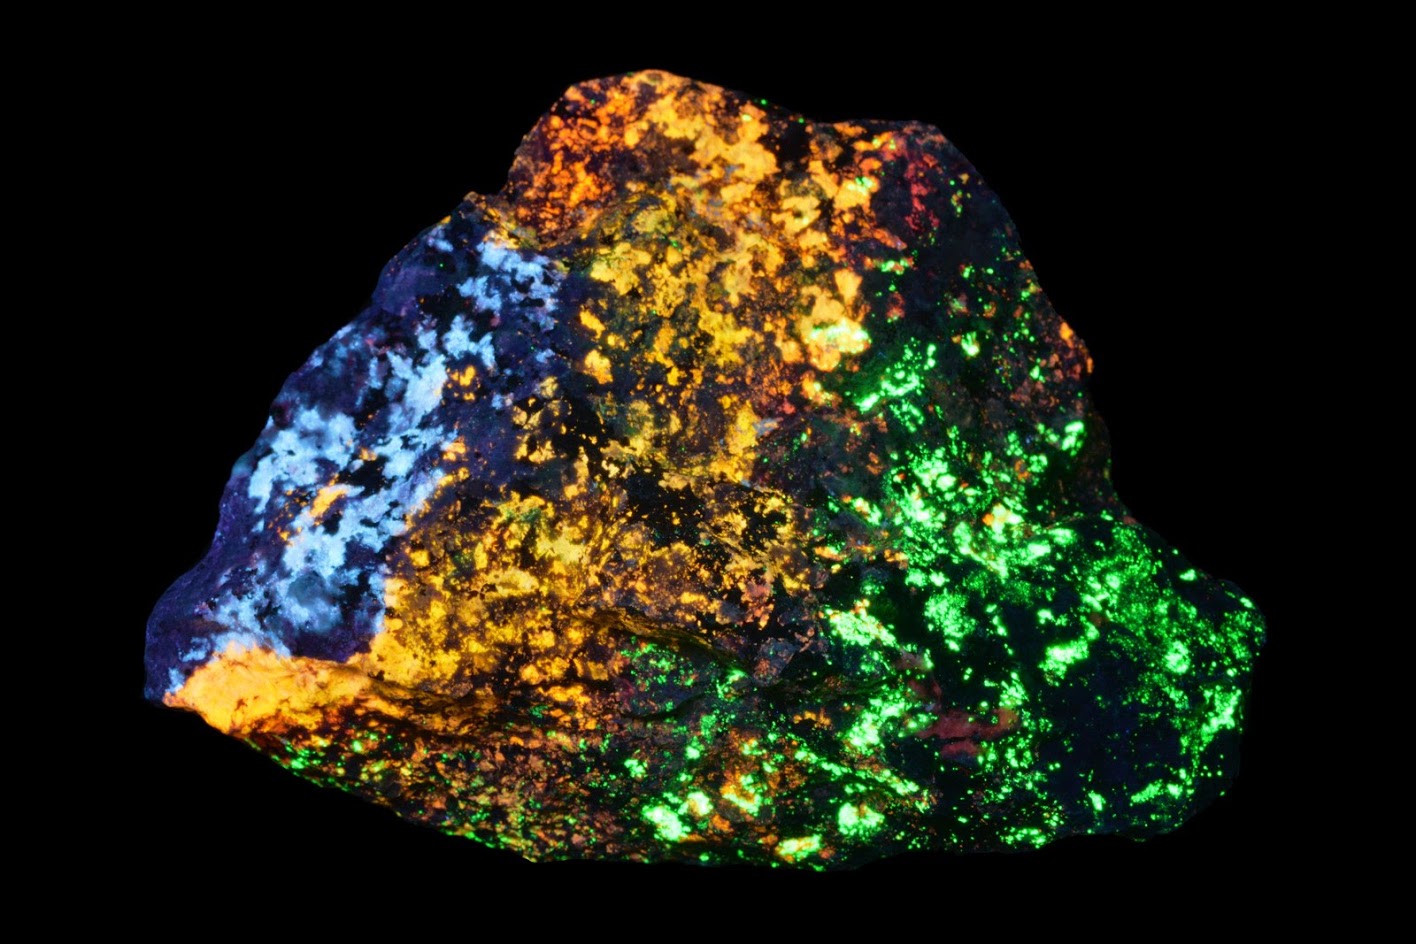
Afghanite, Calcite, Lazurite, Phlogopite, Albite and Pyrite
Sar-e-Sang, Kotchka Valley, Badakshan Province, Afghanistan
Shortwave
© Mark Cole

Plumbogummite after Pyromorphite
Yanhshuo Mine, Guilin Prefecture, Guangxi, China
© Mark Cole

Willemite, Calcite, and Fluorite
Norra Mine, Garpenberg, Sweden
Full wave
© Mark Cole

Calcite, Aragonite, Chrondrodite, Diopside
Long Lake Zinc Mine, Ontario, Canada
Shortwave
© Mark Cole

Marialite, Phlogopite, Afghanite, Calcite, Pyrite
Sar-e-Sang, Kotchka Valley, Badakshan Province, Afghanistan
Full wave
© Mark Cole

Calcite, Fluorite
Morocco
Midwave
© Mark Cole

Aragonite
Cozzo Disi Mine, Casteltermini, Agrigento, Sicily, Italy
Shortwave
© Mark Cole

Wollastonite, Miserite, and Aegirine
Union Carbide Vanadium Mine, Potash Sulphur Springs, Garland County, Arkansas.
Shortwave plus mid-wave
© FireViper

Calcite and aragonite
Helvetia Mine, Arizona
Shortwave
© FireViper

Tenebrescent Hemimorphite, Fluorapatite, Tarbuttite
Skorpion Mine, Namibia
After 30 secs exposure to shortwave
© FireViper

Calcite, Barytocalcite, Witherite, Baryte, Fluorite, and Hydrozincite
Rampgill Mine, Nenthead, England
Shortwave
© FireViper

Calcite with minor willemite
Buckwheat Dump, Franklin Mine, New Jersey
Longwave
© FireViper

Red-fluorescing Scheelite, Fluorite and Quartz
Dongshan Mine, Hunan, China
Mid-wave
© FireViper

Calcite
Cserhát, Vác, Naszály, Hungary
Longwave
© FireViper

Calcite, Willemite, Smithsonite
Puttapa Zinc Mine, Australia
Shortwave
© FireViper

Adamite, Calcite wit unknown blue
Ojuela Mine, Mapimi, Durango, Mexico
Longwave
© FireViper

Sodalite, Analcime, with uranyl and minor tugtupite
Taseq West, Ilimaussaq Complex, Greenland
Shortwave
© FireViper

Lemon Opal, with uranyl
Manhattan Mine, Napa County, California
Shortwave
© FireViper

Calcite, Willemite, Smithsonite
Puttapa Zinc Mine, Australia
Shortwave
© FireViper

Mosaic of shell fragments in sedimentary rock
Herzliya, Israel
Longwave
© FireViper

Fluorite, Quartz, Lepidolite on Marmatite
Yindu Mine, Chifeng City, Inner Mongolia, China
Longwave
© FireViper

Willemite, Calcite, Fluorite, Sphalerite
Norra Mine, Garpenberg, Sweden
Shortwave + Longwave
© Marco Frigerio

Calcite, Quartz, Dolomite
La Sassa, Italy
Shortwave
© Marco Frigerio

Imperial Topaz
Capão Mine, Ouro Preto, Brazil
Natural, Shortwave, Longwave
© Marco Frigerio

Calcite, Fluorite
Pure Potential Mine, Arizona
Midwave + Longwave
© FireViper